Checklist Definitions
- Yves Riel
- Kirill Menshov (Unlicensed)
- sidharth sharma (Unlicensed)
Adding Checklists in JIRA consists of setting up Checklist definitions which basically act as templates from which the issue's Checklist are created. This is where you set up Global Items and determine the context in which the Checklist will be displayed.
Default Checklist Definition
When installed for the first time, the Checklist add-on creates a default Checklist definition. You can either rename or delete it if you want to create your own definitions.
To add definitions for Checklist, ensure that you have administrator rights in JIRA and that you can access the administrative menus.
Adding a Definition for Checklist
To add a new definition for the Checklist add-on, perform the following steps:
- Navigate to Settings > Add-ons > Checklist Definitions.
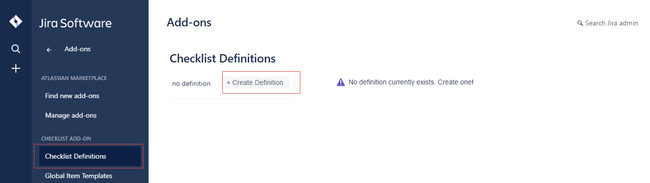
- Click Create Definition.
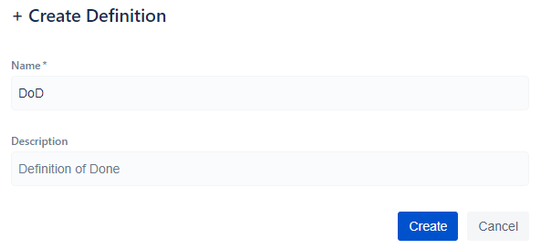
- In Name, specify the name for the Checklist definition.
- (Optional) In Description, specify a description for the Checklist definition.
- Click Create.
Your new Checklist definition should now be added to the list. Since definition are by default applicable to all projects and issue types. It will be immediately visible in issues.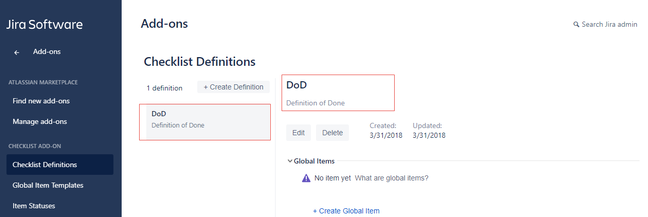
Multiple Checklists
You can create multiple definitions if you want to have more than one Checklist in an issue.
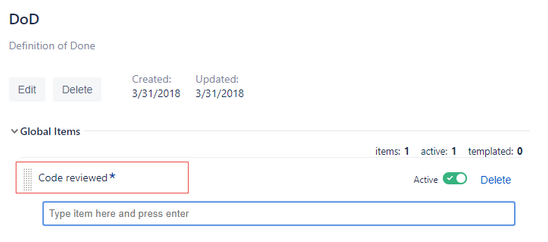
Adding Global Items to a Definition
Global Items are items that are applicable to all issues. They are useful when you want to standardize a set of Checklist items across all issues. Every time you modify, add, or remove a global item, the issue's Checklist immediately reflects the changes.
To add a new global item, perform the following steps:
- Navigate to Settings > Add-ons > Checklist Definitions.
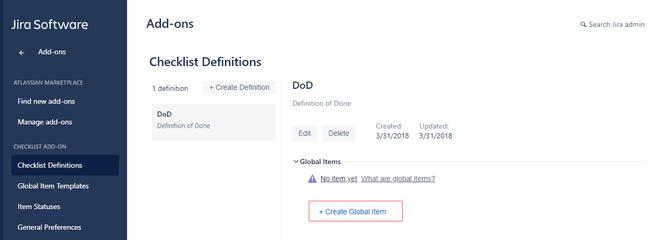
- Click Create Global Item, type the name that you want to add, and press the ENTER key. The new global item is added to the list.
Global Item Template
If you have added Global Item Templates, the system displays the templates that match your searched text. To select a specific template, click the template.
Disabling a Global Item
You can temporarily remove a global item from every Checklists.
To do so, toggle the Active button beside the item's name. Once disabled, the item disappears from all Checklists but remains in the list of Global Items.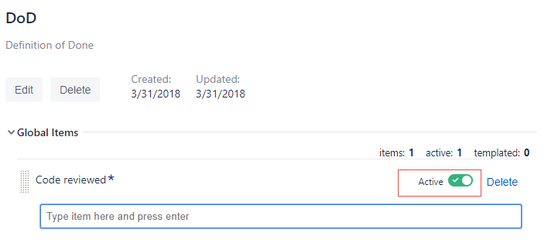
Great for a DoD
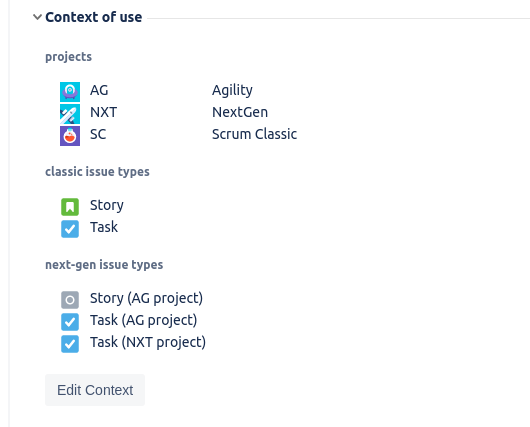
Setting Context
If you want to restrict the visibility of a specific Checklist, you can set the context. By default, Checklists are visible in all the issues. By setting the context, the Checklist becomes only visible for the selected project(s) and/or issue type(s).
To set context, perform the following steps:
- Navigate to Settings > Add-ons > Checklist Definitions.

- Click Edit Context.
The Edit Context dialog box appears.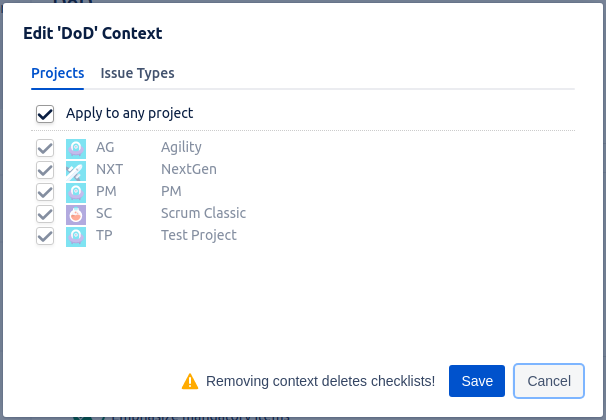
- Select the projects/issue types.
You can select multiple issue types, or choose to apply the definition to any project/issue type (this will also include any new project or issue type created later).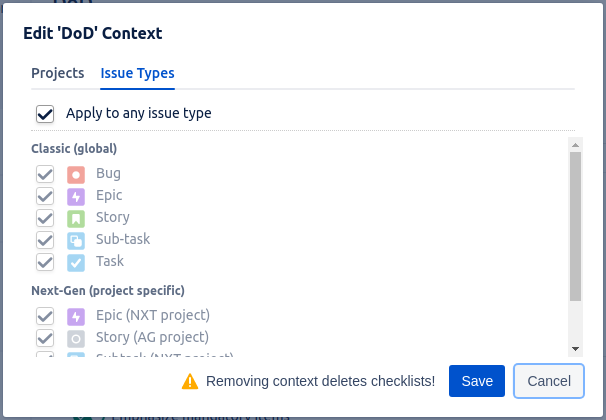
Note that it is possible to select no projects and/or no issue types at all. In this case the definition will not be applied to any issue, which can be used to disable the definition. However, keep in mind that removing any context element causes the old checklists to be permanently deleted as soon as an issue is opened by anyone. - Click Save.
Modifying the Context
Be careful when you remove projects or issue types from the context. The changes will be immediately effective and may cause some Checklists to be permanently removed.
Next-Gen Issue Types
Next-gen projects are the new type of projects in Jira. Among other changes every such project has its own internal set of Issue Types which is only used by this project and is not shared. So if you're applying your definition to some specific kind of issue type(s) (in contrast to applying it to 'Any issue type'), please select all relevant next-gen issue types accordingly.
Related content
© 2018 Okapya Software Solutions Inc