Importing Checklist Items
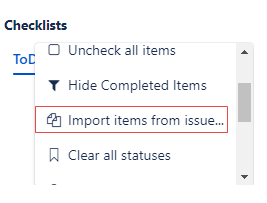
Checklist provides a nice and flexible mechanism to import items from existing issues. Hence, Checklist saves you the trouble of retyping them over and over again. You access this functionality through the header menu.
To import Checklist items, perform the following steps:
- Access the issue whose items you want to import.
- Navigate to the Checklists section and click Import items from issues.
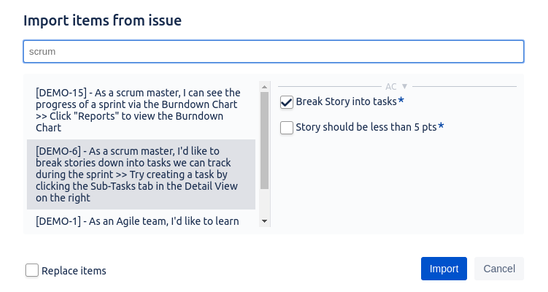
This opens a dialog where you can search for issues. Search for any text that is present in the issue's summary or description. You can select the desired issue. The system displays all of its local items. If the issue has multiple Checklists, all the items are displayed but they are grouped by Checklist. The items displayed are only the items local to the issue, Global items are not shown.
Search by Issue Key
You can select a specific issue if you type the Issue Key. However, note that the issue key must be typed in uppercase letters (for example, PROJ-13).
Once the issue has been selected, check all the items that you want to import and click Import.
Importing from multiple issues
If you want to import items from multiple issues, you must import the items from the first issue, reopen the dialog, select the items from the other issue, and import them.
- If you want the imported items to completely replace the current items, select the Replace items check box in the bottom right corner of the dialog. By default, imported items are appended to the Checklist.
© 2018 Okapya Software Solutions Inc

