Validating a Checklist
- Yves Riel
- Kirill Menshov (Unlicensed)
- sidharth sharma (Unlicensed)
Transition between workflow statuses can go through a validation phase to determine if the transition can go on. To learn more about Configuring Workflows and Workflow Validators, consult the Atlassian Documentation.
To validate a Checklist, ensure that you have administrator rights in JIRA and that you can access the administrative menus.
Next Gen Projects
Validation is unfortunately not available is Next Gen projects due to Jira limitations. We are monitoring Next Gen project development so that we can offer validation as soon as possible.
To prevent an issue from transitioning from one state to another until a checklist is completed, perform the following steps:
- Navigate to Settings > Add-ons > Checklist Definitions.
Under the Preferences section, select the Sync with custom field check box. This creates a custom field with the name: Checklist Progress, followed by the name of the definition.
For more information, refer to the Configuring a Checklist page.
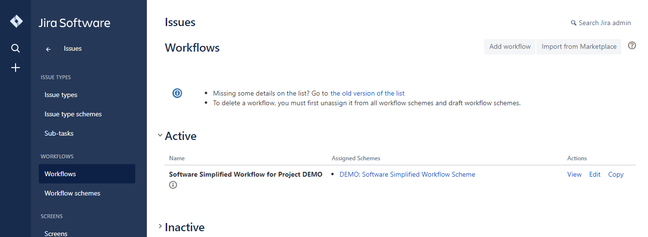
- Navigate to Settings > Issues > Workflows.
- Edit the desired workflow
- Click the transition that you want to apply the validator to. For example, Done.
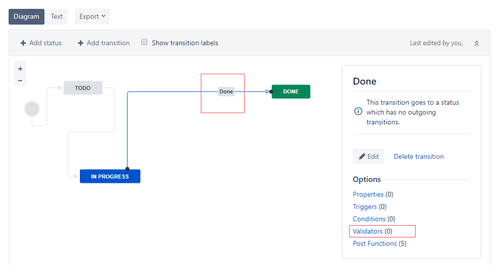
- Click Validators.
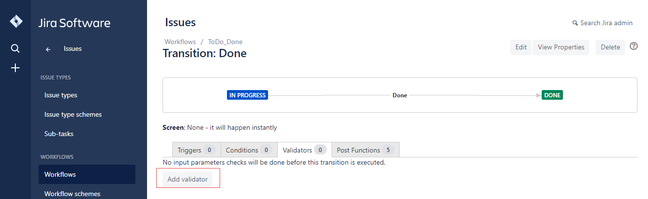
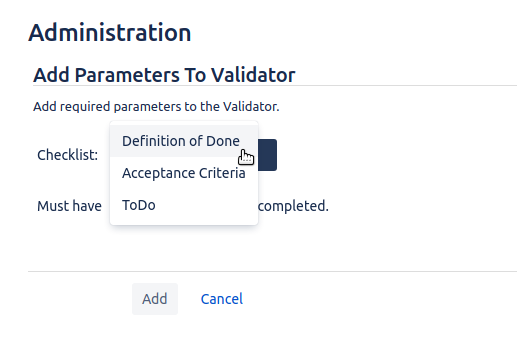
- Click Add validator, select the Checklist Validator option, and click Add.
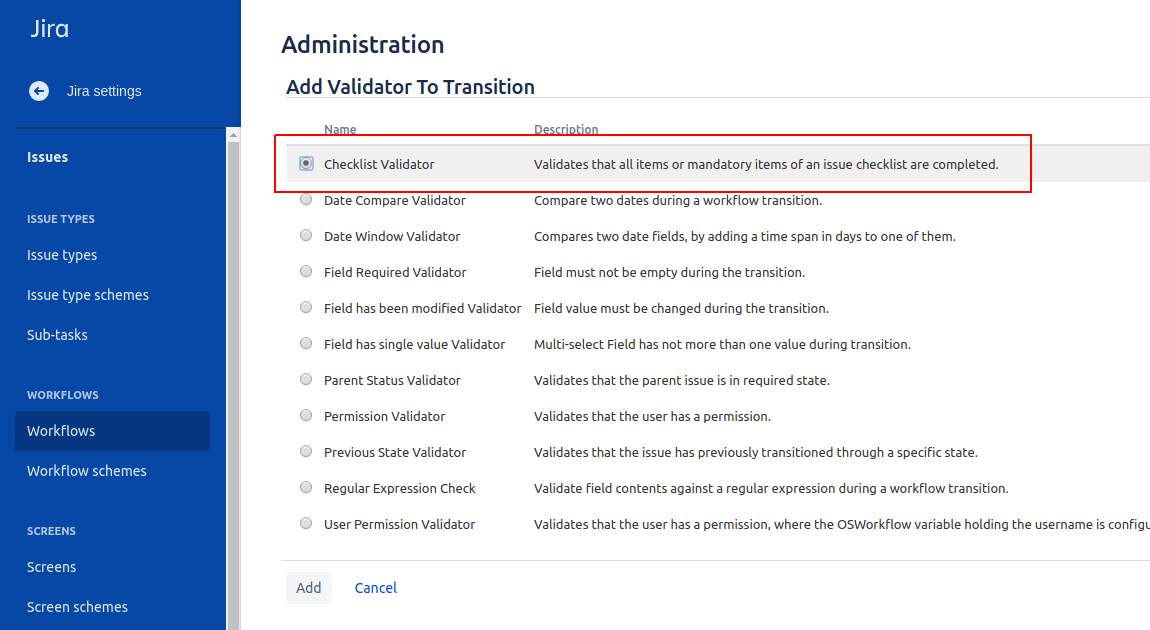
In the dropdown list select the checklist you need to validate. If you don't see your checklist here, look for the information messages on the page and consult the notes below.
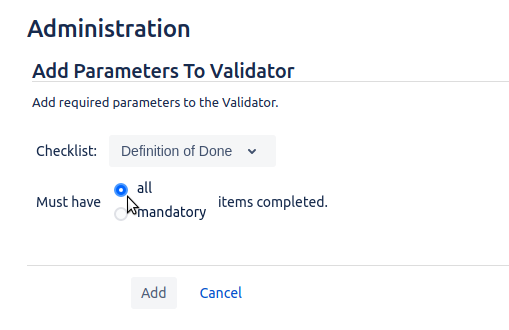
- Select the appropriate type of validation: either all items need to be completed or only the mandatory ones. Click the Add button.
- Publish your workflow to ensure that the validator is active.
Notes
For a validator to work you need to configure the definition to sync its completion state with Jira (see step 2 above) so that the corresponding customfield exists.
If some definition does not sync its data, you will see a notification when trying to create a validator. If some definition is configured to sync its data but the customfield does not exist anymore (e.g. it was accidentally deleted), you will see an error message.
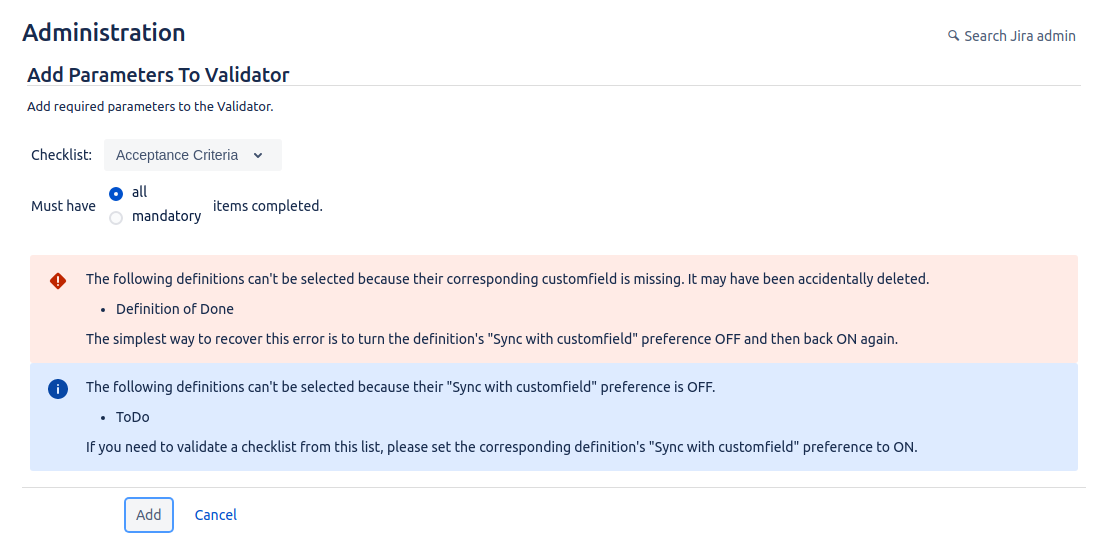
Similarly, when viewing the validator, you will see an error if its customfield no longer exists:

Legacy RegExp validator configuration
If you experience any problems with the checklist validator, please contact us via the support portal.
In the meantime you can use the old way to create a RegExp validator manually, as described here. However, please note that this approach is outdated and is generally not recommended.
Related content
© 2018 Okapya Software Solutions Inc