This documentation is for version 4.x. For the latest documentation, click here
Adding a Checklist Field to JIRA
- sidharth sharma (Unlicensed)
If you are not familiar with adding a custom field, refer to the Atlassian JIRA documentation.
To use the Checklist add-on, you must add a custom field in JIRA.
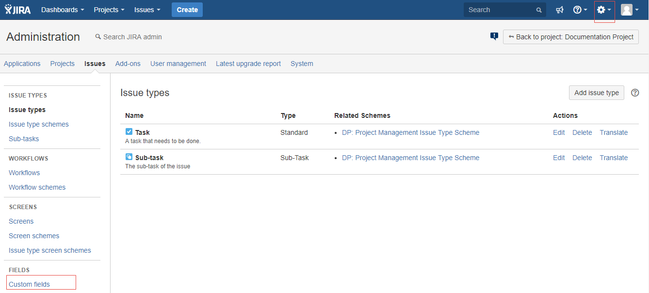
To add a Checklist, ensure that you have administrator rights in JIRA and that you can access the administrative menus.
To add a new Checklist, perform the following steps:
- In the Administration menu, go to Issues and click Custom fields.
- Click Add Custom Field.
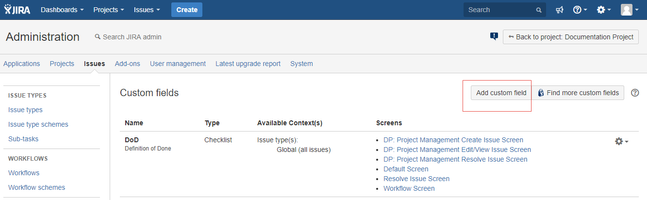
The system displays the Select a Filed Type window.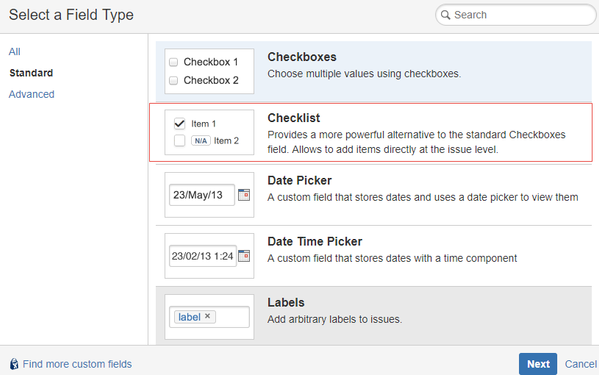
- Select the Checklist field and click Next. If you do not see the Checklist field, ensure that the Checklist add-on was properly installed.
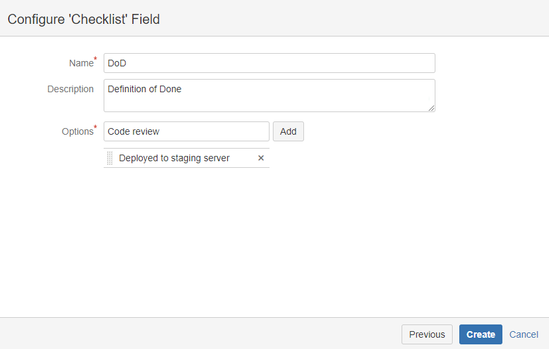
Specify the name and description for the Checklist.
In Options, add any items (options) that will be globally displayed in the Checklist for all the issues applicable to the custom field context.
JIRA Assumes Options are mandatory!
JIRA will force you to enter at least one option since the Options field is mandatory. If you do not want to enter options as you will not have any global items, enter a dummy option that you can remove from the Custom Field Configuration page. Apologies for the inconvenience but this is a limitation of JIRA. JIRA assumes that this field is mandatory. Please vote for issue JRA-37309 to get it resolved.
Click Create.
The system displays a window where you can associate the Checklist with screens where you want the Checklist field to appear.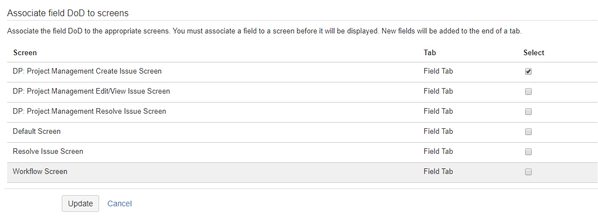
Select the screens and click Update.
You will have a new Checklist in JIRA.