This documentation is for version 4.x. For the latest documentation, click here
Configuring a Checklist
- sidharth sharma (Unlicensed)
- Yves Riel
- Maxime Lefebvre
If you are not familiar with configuring a custom field, refer to the Atlassian JIRA documentation.
Typically, custom fields are configured via Default Value and Options. Checklist adds the options: Discretionary Options, Parameters, and Statuses.
To configure Checklist parameters and statuses, ensure that you have administrator rights in JIRA and that you can access the administrative menus.
Configuring Checklist Parameters
To configure the Checklist parameters, perform the following steps:
- In the Administration menu, go to Issues and click Custom fields.
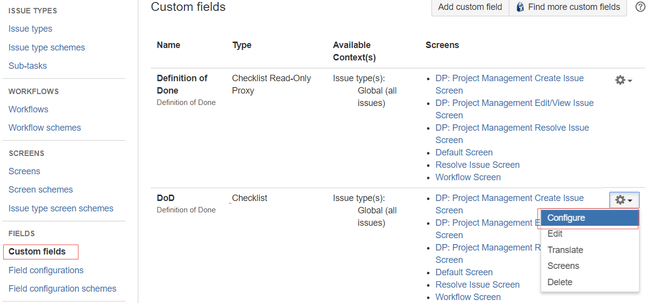
- For a specific custom field, click Configure.
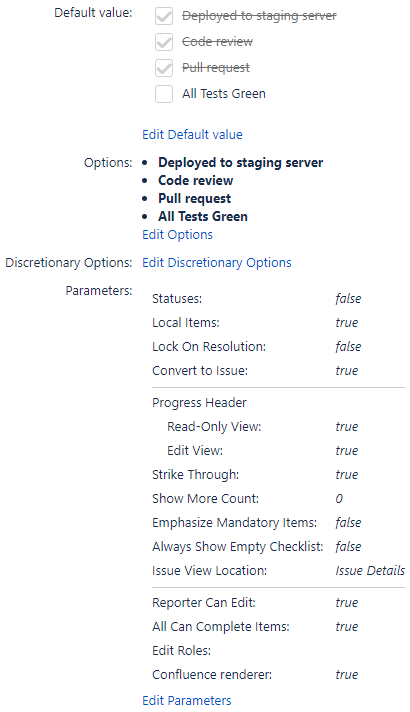
Default Value Select the options that need to be automatically checked when the issue is created. Options Create the global items that must be globally displayed in the Checklist for all issues applicable to the custom field context. When you add, modify or remove options, the Checklist is updated as soon as they are viewed or edited. When an option is deleted, it is immediately removed from all issues whether they are closed or not.
Great for Definition of Done
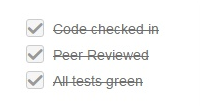
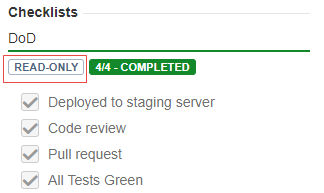
To control the Definition of Done (DoD) over time, it is recommended that you disable options and not remove them. Disabling an option removes it from all issues but keeps the option in the system. The global items represented by disabled options stay visible in the Checklist as long as they remain completed (checked). This offers an excellent mechanism for tracking the progression of items over time in a Definition of Done.
Immutable Items
Checklist items added here are immutable. Thus, these items cannot be removed or edited (while editing the issue or during a post-workflow transition). If a global Item is disabled, the item remains in the Checklist only if it is checked. As soon as it is unchecked, it is removed from the Checklist.
Discretionary Options Select the options that are optional. Optional items can be ignored by the Checklist Validator during a workflow transition. Parameters Customize how the Checklist should behave and be displayed. Possible parameters are:
Statuses Allows the items to have statuses. The default statuses are N/A, IN PROGRESS, BLOCKED. You can enable/disable the default statuses. Additionally, you can create custom statuses. For more information, refer to the Configuring a Checklist#status section.
Disabling a status removes the reference to that status from the JIRA instance.
Local Items Allows users to add items local to the issue.
You can use this option if you want to lock down the Checklist and only allow global items.
Lock On Resolution Prevents the update of global items when an issue is resolved. Deleted global items are removed even if the issue is closed.
As soon as this parameter is set, it is possible that currently closed issues or issues closed without touching the checklist are not showing global items anymore. By default, checklist will persist its data only when something is added/removed/changed from the default values. To avoid this behavior, you need to ensure that checklists are modified and saved before closing the issue. You can achieve this automatically by adding a Workflow Function appending no items to the checklist on the transitions resolving/closing the issue. This will force the checklist to persist its data to the database and will lead to the expected behavior.
Allows users to convert checklist items into issues.
For individual conversion, a button is shown while hovering over each checklist item. For bulk conversion, an option is added to the header's menu. In both cases, a modal window will open requesting the user to choose the Issue Type in which the item(s) will be converted to.
Selecting Sub-Task Issue Types will convert the items into Sub-Tasks. If the Checklist is already in a Sub-Task, then the items will be converted into sibling Sub-Tasks.
The conversion process will fail if the target Issue has mandatory custom fields. If this is mostly the case for all issues and that you want to disable this feature across the entire Jira instance, you can disabled the plugin module Checklist Convert to Issue Action in the Checklist Add-on section under the Manage Apps admin page.
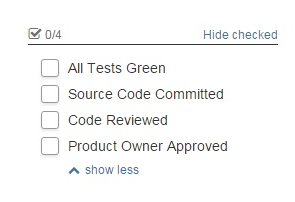
Progress Header Displays a header containing completion progress and checklist operations.
For flexibility, this feature can be enabled or disabled for either the Issue View or Edit View.
Strike Through Applies a strike through effect on the text of checked items.
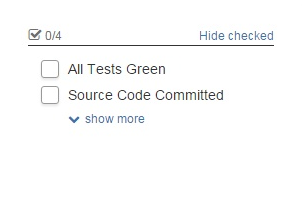
Show More Count Sets how many items should be listed before displaying the show more link. This can be turned off by setting the count to zero (0). In such a case, all the items are always displayed.
Emphasize Mandatory Items Displays an asterisk (*) at the end of mandatory items so that can be easily identified. Displays the checklist in the issue view at all time, even if the checklist is empty.Jira's default behavior is to hide Custom Fields when they have no values. With this feature enabled, the Checklist will be rendered on screen with an "Empty" label, giving the users the opportunity to quickly fill the checklist without having to open the edit dialog.Reporter Can Edit Allows the active reporter of the issue to edit the items even if the reporter is not a member of the roles selected in the Edit Roles parameter. All Can Complete Items Allows all users to complete and assign statuses to the existing items. If not selected, only the users that have the Edit Roles permission can complete/assign statuses.
For an user who does not have the Edit Roles permission, the Checklist status cannot be modified.
Edit Roles Allows you to select the project roles which can edit the checklist. If no role is selected, every user can edit the checklist. By default, users can edit a Checklist if they have the Edit Issue permission in JIRA. However, is some cases, you may want to have more control over who can edit the Checklist. In such a case, select the roles that have the right to add/remove items at the issue level. Not selecting any roles allows everyone with Edit Issue permission to edit the Checklist.
Confluence renderer Replaces the default Xml renderer with a Confluence renderer so that Checklists can be properly displayed in Confluence. Deselecting will result in using the old XML format which is better suited when exporting in XML. If you need to export in XML and need to disable this parameter, use a Checklist Proxy instead if you with to display in Confluence.
Validate Options This is an advanced configuration parameter that should only be disabled if you are experiencing crashes or freezes when removing options. Reported problems occurred on PostgreSQL and MySQL databases. These problems are caused by bugs in Jira. Clever Changelog This option changes the way the issue history is generated when modifying the custom field. If disabled, the history will contain a list of all items before and after the change, letting you compare the changes manually. If enabled, the before and after sections will only show items that were added, modified or removed.
Configuring Checklist Status
To create your own set of custom statuses or to update the default statuses, perform the following steps:
- In the Administration menu, go to Issues and click Custom fields.
- For a specific custom field, click Configure.
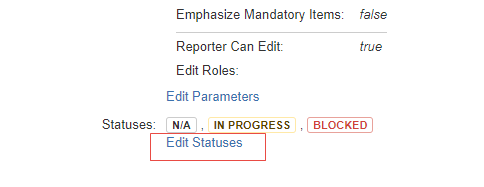
- Click Edit statuses.
The system displays the status editor (in the CSV format). By default, N/A, IN PROGRESS, BLOCKED statuses are already displayed. Each line must have 5 parameters delimited with a comma. The parameters order is: Status ID, Status name, Status Style, Completion Behavior, Status Behavior.
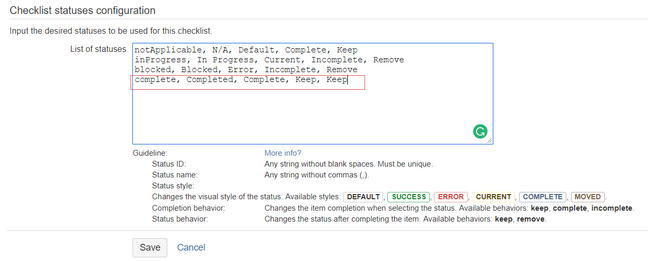
In Status ID, specify a unique ID that ensures that future changes to the statuses are applied to the proper items.
In Status name, specify the name for the status.
In Status style, specify the style for the statuses. Styles for the statuses are applied as per the JIRA's UI library. The available options are: Default, Success, Error, Current, Complete, Moved.
In Completion behavior, specify the completion behavior when you select the status. The available options are keep, complete, incomplete.
Keep When a status is added to the item, the check box is left as it is. Complete When a status is added to the item, the check box is marked as completed. Incomplete When a status is added to the item, the check box is marked as incomplete. In Status behavior, specify the status behavior after you change the item's completion. The available options are keep, remove and reset.
Keep When an item is completed, the status is left displayed. Remove When an item is completed, the status is removed.
You cannot create a custom status where the value Remove for Status behavior is combined with the Keep or Complete values for Completion behavior.
Reset When the status is applied, the item is marked as completed and when the item is unchecked, the status is removed.
You cannot create a custom status where the value Reset for Status behavior is combined with the Keep or Incomplete values for Completion behavior.
- Click Save.