| Note |
|---|
You need administrator rights in Jira to perform the tasks on this page. |
Before you begin
Ensure that you have the latest version of Checklist installed or at least version 5.2.4, which contains numerous bug fixes and improvements.
Read /wiki/spaces/CHKDOC5/pages/3024453674, as migrating to Cloud comes with a number of limitations that you should be aware of before proceeding.
For each Checklist custom field context that you want to transfer, if the context is marked “All Projects”, check whether it really is required for all projects or not. Custom fields will often have an All Projects context that only ends up applying to certain projects due to the screens on which it can appear. The issues in which the custom field does not appear will still save global items to the database, which can lead to a lot of useless data that will take time to transfer to the Cloud. By limiting the custom field context to specific projects, this extra data will not be transferred, resulting in a smoother import process.
If you are doing a step-by-step migration, you can select only the projects that you want to export. This will not only minimize the data to import, but also prevent errors that would occur if you exported data from projects that have not yet been migrated to Cloud. This only applies if your custom field context already has projects; if it’s set to “All Projects”, a partial migration is not recommended. Note that there are limitations with doing partial migrations, and you should read Importing data into a new definitionfrom Server or Data Center first.
Enabling the Checklist Export Feature Action module
This feature is disabled by default and must be enabled before you can proceed with exporting your data.
Go to Administration > Manage apps.
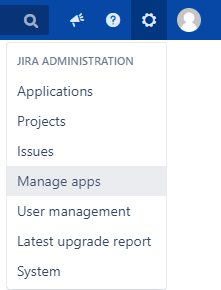
In the sidebar, go to Atlassian Marketplace > Manage apps.

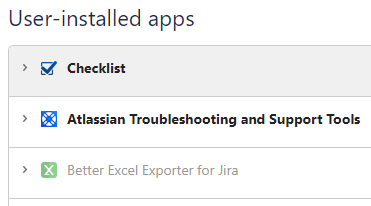
Click on Checklist to expand the app details.
Click on [X] of [X] modules enabled to see all the enabled modules (these numbers will be different for everyone).
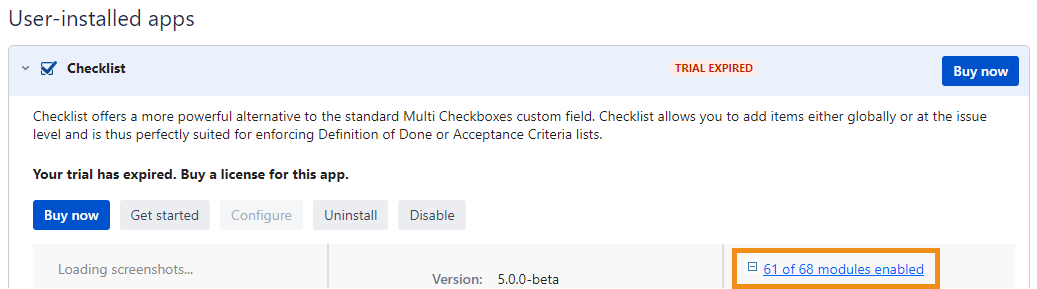
Locate the Checklist Export Feature Action module, hover over Disabled, and click the Enable button that appears.

Exporting a custom field context from Server
Each custom field context must be exported separately.
Go to Administration > Issues.
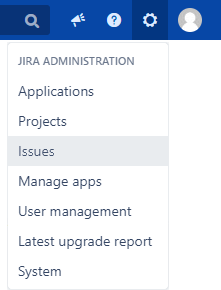
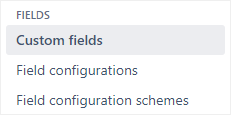
In the sidebar, go to Fields > Custom fields.
In the Actions column, click the menu icon for a specific Checklist custom field and click Configure.

Click Export.

The Checklist Export page that appears will display the destination path and file name of the exported files. To begin the process, click Export. You can also select specific projects to export in case you want to perform a partial migration.
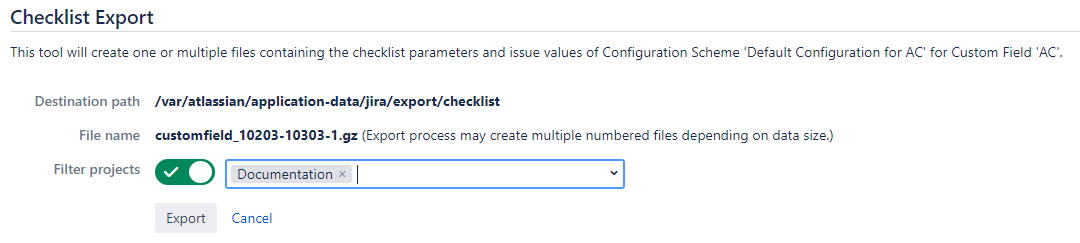
Once the export is complete, a success message will be displayed.

| Note |
|---|
If no file was created, it may be due to an issue with the read/write permissions on the destination folder. You can find more details about the error message in your Jira log file or console. If you are unable to resolve the issue yourself, please contact our Service Desk. |
Importing the custom field context in Cloud
Since this feature is still in beta, please contact our Service Desk so that we can enable the import feature on your Cloud instance.
| Status | ||
|---|---|---|
|