...
...
...
...
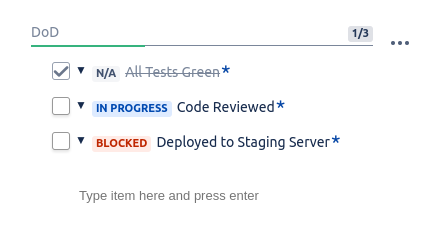
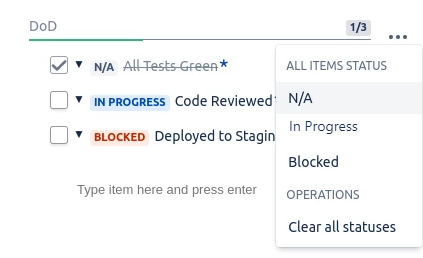
Checklist comes with a set of built-in statuses that items can be set to. Available statuses are:
| N/A | Indicates that the item is not applicable. Setting the |
|---|
...
| N/A status checks the item as marked. | |
| In Progress | Indicates that work is being done to resolve the item. Setting the status to In Progress |
|---|
...
| removes the check mark if it |
...
| is present. Setting the item as |
...
| Completed also removes the In Progress status. | |
| Blocked | Indicates that blockers prevent the item from being completed. Setting the status to Blocked |
|---|
...
| removes the check mark if it was present. Setting the item as |
...
| Completed also removes the Blocked status. |
| Info | ||
|---|---|---|
| ||
The predefined statuses are added when you initially install the add-on. However, the list of statuses can modified, including the predefined ones, from the Statuses Page in the admin section. |
Assigning a status to an item
...
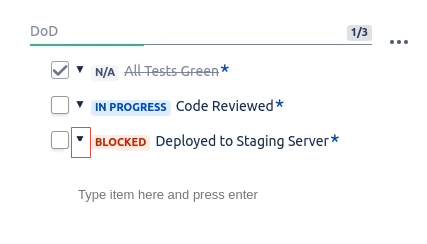
To assign a status to a single item, perform the following steps:
- Navigate to the Checklists section for the specific issue.
- Add an item for the issue.
- Click the drop-down arrow to the right of the
...
- check box (corresponding to an item).
The list of available statuses
...
- appears.
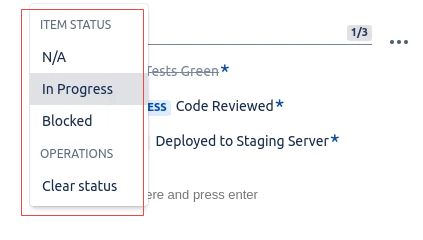
- Click the status that you want
...
- to add
...
- to the item. If you
...
- do not want to select a status,
...
- click outside of the
...
- drop-down menu.

...
Assigning a status to all items at once
...
To assign a status to all the items
...
at once
...

...
, perform the following steps:
- Navigate to the Checklists section.
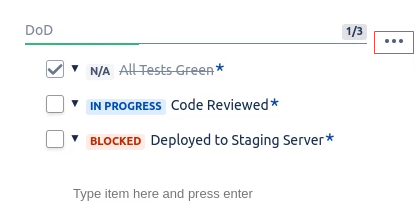
- Click the ... option and set the status.
Related articles
| Filter by label (Content by label) | ||||||||
|---|---|---|---|---|---|---|---|---|
|
| Page Properties | ||
|---|---|---|
| ||
|