Checklist allows you to assign statuses to items. You can configure the list of available statuses and their behaviour from the Statuses page in the admin section of JIRA.
| Note |
|---|
To create/view status for checklist, ensure that you have administrator rights in JIRA and that you can access the administrative menus. |
Viewing Status
To view the statuses, perform the following steps:
- Navigate to Settings > Add-ons > Item Statuses.
You can view the list of statuses.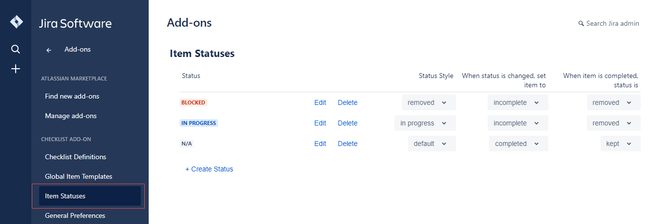
Creating a Status
To create a new status, perform the following steps:
- Navigate to Settings > Add-ons > Item Statuses.
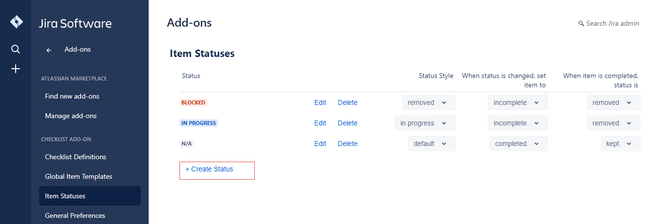
- Click Create Status.
- Type the name of the status. The new status is automatically added to the list of available statuses.
Status Configuration
Besides the name for a status, the look and feel, and behavior of status can be configured.
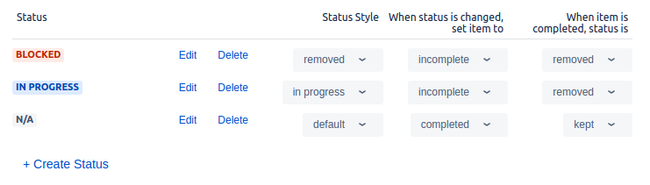
Status Style | This option allows you to set the colour of the status' label to any of JIRA's official status styles:
|
|---|---|
When the status is changed, set item to | This option allows you to set the completion state of the item when the status is set. You can chose any of the following three choices:
|
When the item is completed, status is | This option allows you to set what happens to the item's status after the item has been marked as completed. You can chose any one of the following two choices:
|
Related articles
| Filter by label (Content by label) | ||||||||
|---|---|---|---|---|---|---|---|---|
|
| Page Properties | ||
|---|---|---|
| ||
|