| Note |
|---|
You need administrator rights in Jira to perform the tasks on this page. |
Once you have gone to the Custom fields page (see Configuring the Checklist custom field), click Edit Parameters to customize the various checklist settings:
On this page:
| Table of Contents | ||
|---|---|---|
|
The following page will appear:
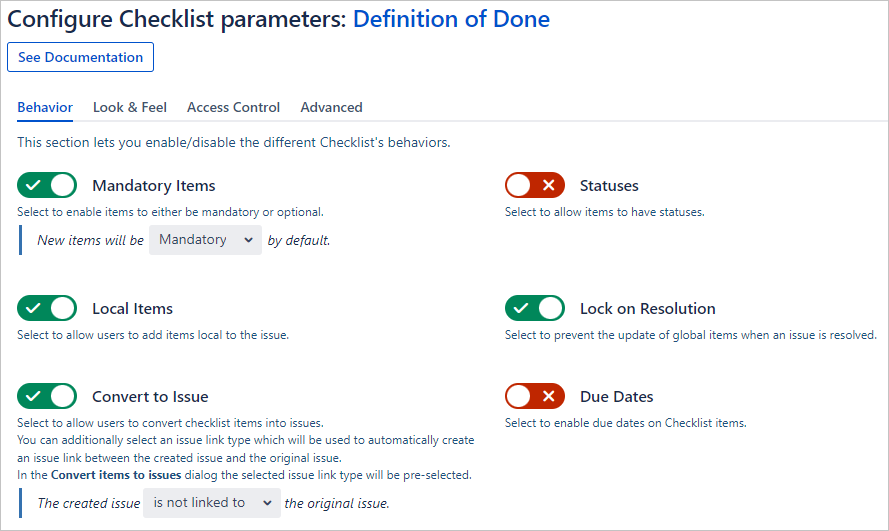
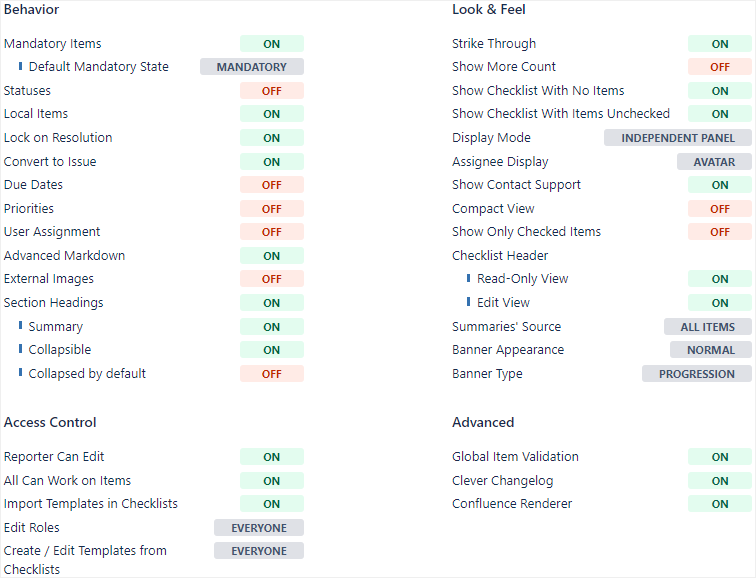
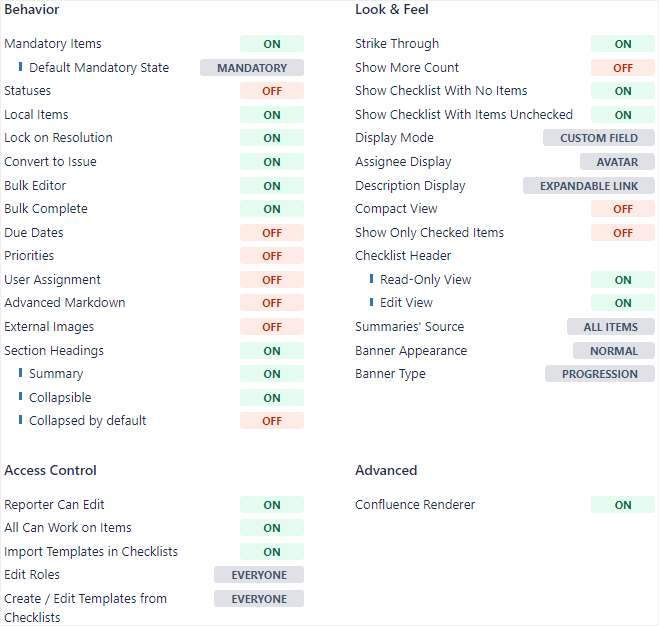
Behavior
These parameters control the functionalities of the checklist.
Parameter | Toggle | Description | ||||||
|---|---|---|---|---|---|---|---|---|
Mandatory Items |  | The following effects occur:
| ||||||
 | The existence of this feature is ignored completely, and new checklist items are not considered to be either mandatory or optional, and will appear as a standard checkbox without an asterisk. If this feature is enabled at a later date, any checklist items that were created while the feature was off will be considered mandatory by default. | |||||||
Default Mandatory State | | Created items will be mandatory by default. | ||||||
| Created items will be optional by default. | |||||||
Statuses | | Users can assign statuses to checklist items. The default statuses are N/A, In Progress, and Blocked; you can also create custom statuses. 
| ||||||
| Users cannot assign statuses to checklist items. | |||||||
Local Items | | Users can add local items, which are items that only apply to a single issue.
| ||||||
| Users cannot add local items. | |||||||
Lock on Resolution | | Global items that are added or updated will not be reflected in Jira issues that have already been resolved.
| ||||||
| Global items that are added, updated or removed will be reflected in all Jira issues, even if they have already been resolved. Reindexing is required to see those changes in searches. | |||||||
Convert to Issue | | Users can convert checklist items to Jira issues.
You can also select an issue link type, which will be used to automatically create an issue link between the created issue and the original issue. In the Convert items to issues dialog, the selected issue link type will be pre-selected. 
| ||||||
| Users cannot convert checklist items to Jira issues. | |||||||
Bulk Edit | | Users can bulk edit checklist items in issues. | ||||||
| Users cannot bulk edit checklist items in issues. | |||||||
Bulk Complete | | Users can bulk complete checklist items in issues. | ||||||
| Users cannot bulk complete checklist items in issues. | |||||||
Due Dates | | Users can assign due dates to checklist items. 
| ||||||
| Users cannot assign due dates to checklist items. | |||||||
Priorities | | Users can assign priorities to checklist items. The priorities that are available come from the priority scheme currently in use for the project. 
| ||||||
| Users cannot assign priorities to checklist items. | |||||||
User Assignment | | Users can assign checklist items to themselves or other users. 
| ||||||
| Users cannot assign checklist items to anyone. | |||||||
Advanced Markdown | | Users can format their checklists using the full Markdown suite (CommonMark specification), with the exception of HTML blocks.
| ||||||
| Users can only format their checklists using basic Markdown (italics, bold, and hyperlinks). | |||||||
External Images | | Users can embed external images using Markdown syntax.
| ||||||
| Users cannot embed external images. | |||||||
Section Headings | | Users can create headers togroup together checklist items.
| ||||||
| Users cannot create headers. If this feature was enabled and then is later disabled, existing headers are not converted to regular items; instead, it simply removes the ability to create new headers and convert items to headers. |


Look & Feel
These parameters control the visual appearance of the checklist.
General
These parameters apply to the checklist in general.
Parameter | Toggle | Description | ||||||||||||||||
|---|---|---|---|---|---|---|---|---|---|---|---|---|---|---|---|---|---|---|
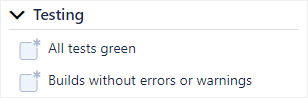
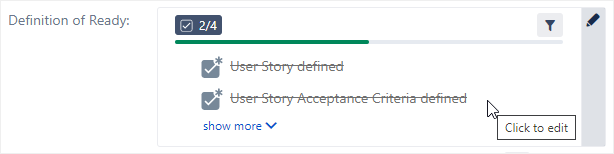
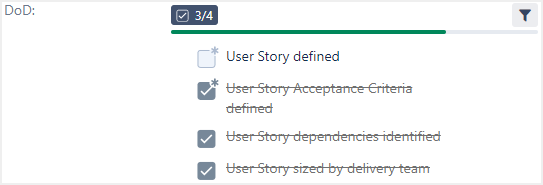
Strike Through | | When the checklist is in read-only view, a strike through effect will be applied to checklist items when they are checked.  This is disabled in edit views, such as the panel display modes and Agile boards. | ||||||||||||||||
| No strikethrough effect will be applied to checklist items when they are checked. | |||||||||||||||||
Show More Count | | On the issue details page, only a certain number of checklist items will be listed before a show more link is displayed. The checklist must be in read-only view for this feature to work, which means that Display Mode must be set to Custom field. 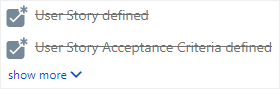 | ||||||||||||||||
| All checklist items are always displayed. | |||||||||||||||||
Show Checklist With No Items | | If Display Mode is set to Custom field, the checklist will still appear in the issue detail view if it contains no items. | ||||||||||||||||
| The checklist will not appear in the issue detail view if it contains no items. | |||||||||||||||||
Show Checklist With Items Unchecked | | If Display Mode is set to Custom field, the checklist will still appear in the issue detail view if none of its items are checked. | ||||||||||||||||
| The checklist will not appear in the issue detail view if none of its items are checked. | |||||||||||||||||
Display Mode | N/A | Applies the selected display mode to the checklist in the issue details view:
| ||||||||||||||||
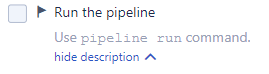
Assignee Display | N/A | Indicates how the assignee is displayed on a checklist item.
| ||||||||||||||||
| 5
| 1
| 1 | A Contact Support link is available in the checklist header’s menu, linking to the Checklist Support portal. 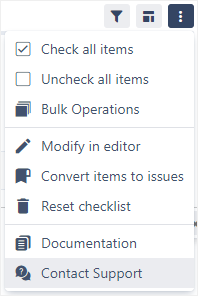 | | No Contact Support link is shown in the checklist header’s menu.
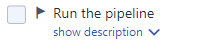
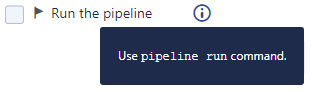
Description Display | N/A | Indicates how the description is displayed on a checklist item.
| ||||||||||
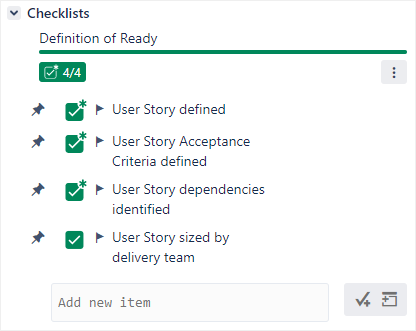
Compact View | | The checklist’s view will be more compact, saving vertical scrolling for longer checklists. 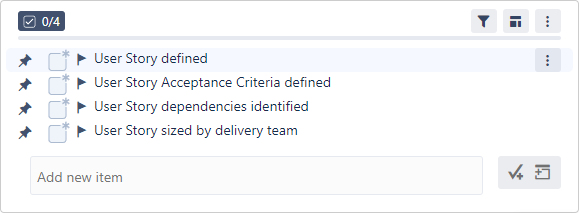
| ||||||||||||||||
| The checklist will have the default look and feel. | |||||||||||||||||
Show Only Checked Items | | The checklist behaves like a standard Checkboxes custom field, where only checked items are displayed in the preview.
| ||||||||||||||||
| All items are rendered in the read-only view. |


Header
These parameters apply to the checklist’s header specifically.
Parameter | Toggle | Description | ||
|---|---|---|---|---|
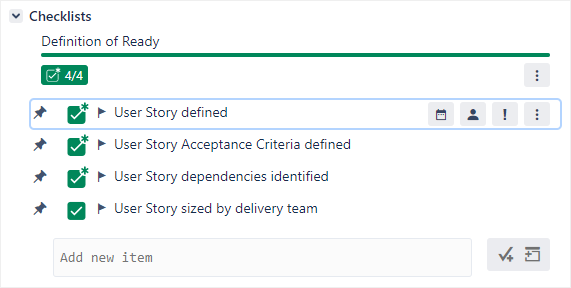
Checklist Header | | A header is displayed at the very top of the checklist that shows completion progress and checklist operations. 
| ||
| No header is displayed at the very top of the checklist. | |||
Summaries' Source | N/A | Indicates what the header’s banner and progress bar base their progression on.
| ||
Banner Appearance | N/A | The color scheme of the banners:
| ||
Banner Type | N/A | The type of banner that will be displayed:
|


Custom Banner Labels
This section is only enabled when Custom Labels is selected for Banner Type in the section above. It allows you to specify custom banners to display when the checklist reaches different levels of completion.
Each label can be dynamically filled with custom variables (see Using variables in custom text fields) and supports basic Markdown (see Using special formatting).
Parameter | Description |
|---|---|
Completed | Displays the entered custom status when the entire checklist is complete. |
Incomplete | Displays the entered custom status when the checklist is partially complete. |
All mandatory | Displays the entered custom status when all mandatory items in the checklist are complete. |
Empty | Displays the entered custom status when the checklist contains no items. |
Access Control
These parameters control which users are able to modify the checklist.
Parameter | Toggle | Description | ||||
|---|---|---|---|---|---|---|
Edit Roles | | Only users who belong to the project roles selected from the drop-down can edit the checklist. | ||||
| All users can edit the checklist, as long as they have the Edit Issue permission in Jira. | |||||
Reporter Can Edit | | The issue reporter can edit the checklist items, even if they do not belong to a project role selected in Edit Roles. | ||||
| The issue reporter cannot edit the checklist items if they do not belong to a project role selected in Edit Roles. | |||||
All Can Work On Items | | All users can complete items and assign statuses, due dates or users to items (but won’t be able to edit or add items). | ||||
| Only the users who belong to the project roles selected in Edit Roles can edit the checklist. | |||||
Import Templates in Checklists | | Users can import templates into checklists in issues using either the Import template menu or the Quick import section of the template drop-down. | ||||
| The Import template menu and the Quick import section are not shown. | |||||
Create / Edit Templates from Checklists | | Only users who belong to the project roles selected from the drop-down can create templates from existing checklists (see Creating and importing Interacting with templates). If no project roles are selected, any user that can edit a checklist can create a template from it. | ||||
| Users cannot create templates from checklists in issues. |
Advanced
These parameters control complex features of the checklist.
Parameter | Toggle | Description | ||
|---|---|---|---|---|
Global Item Validation | | When a user attempts to delete a global item, a window appears that displays the number of issues that contain that global item and prompts the user to either continue or cancel. | ||
| No window is displayed when a user deletes a global item. Turning this feature off can speed up deletion (querying your database using Jira’s process can take some time).||||
Confluence Renderer | | The default XML renderer is replaced by a Confluence renderer, which allows checklists to display properly in Confluence.
| ||
| The default XML renderer is used, which is better suited to exporting in XML. If you need to export in XML and need to disable this parameter, set up a Checklist Read-Only Proxy custom field instead to display your checklist in Confluence. | |||
Clever Changelog | | In the issue history, the before and after sections will only show items that were added, modified or removed when the custom field was modified. | ||
| The issue history will list all items before and after the custom field was modified, letting you compare the changes manually. |
| Status | ||
|---|---|---|
|